QR codes that actually get scanned
The code is the only thing your guests meet. Here is where it goes, how big it has to be, and how to make the cards.
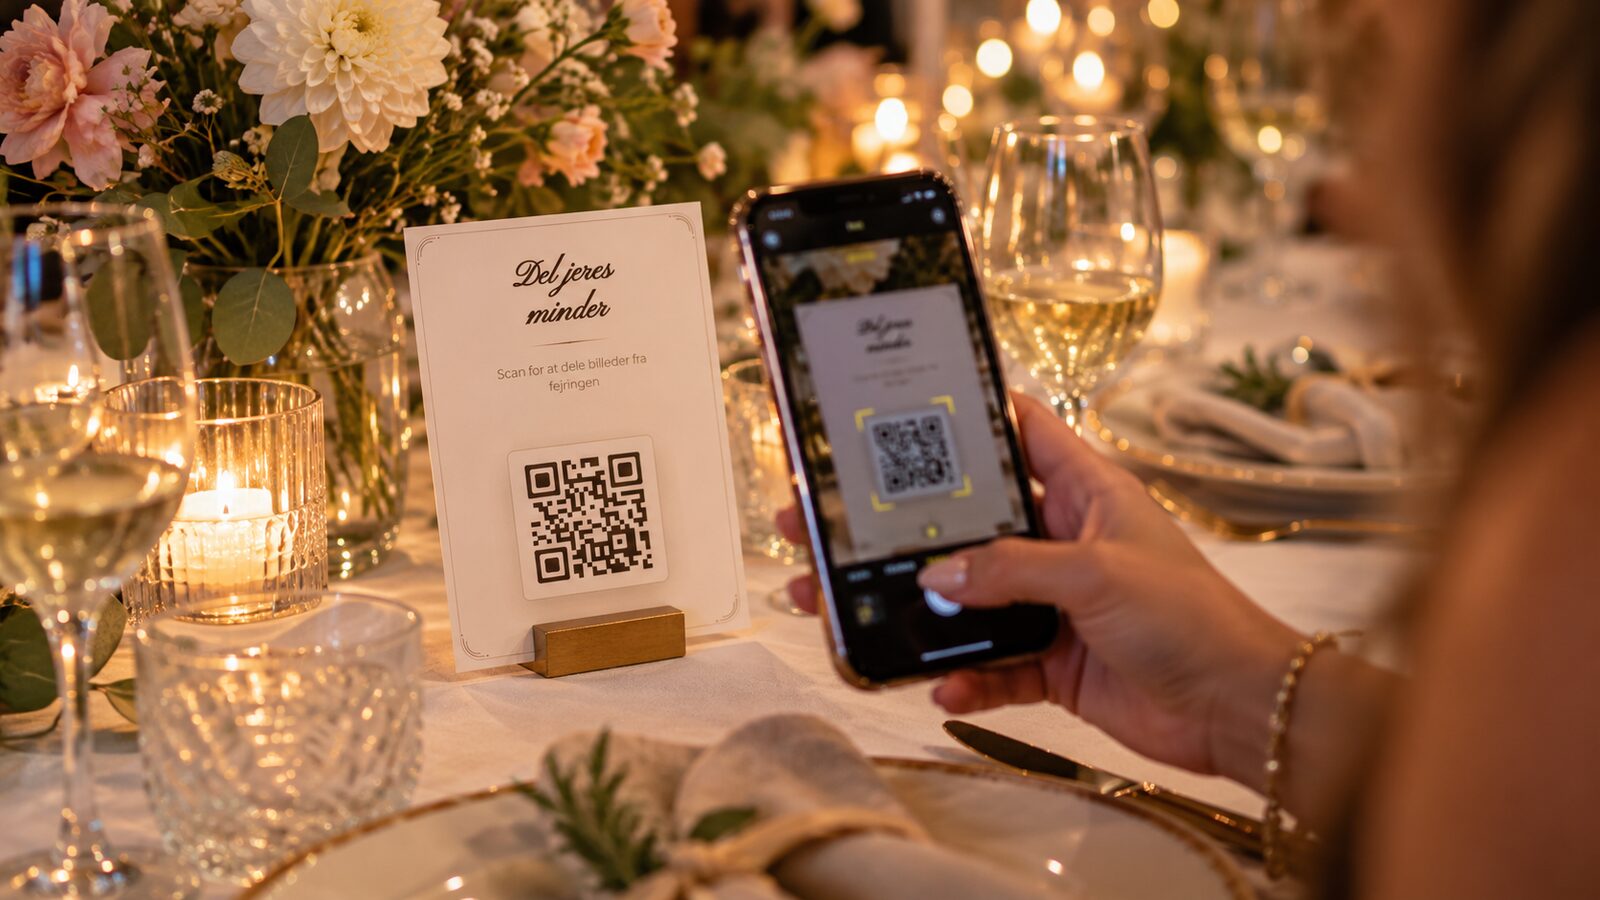
Your guests never see your dashboard. They see a piece of paper with a square on it, and the whole party rests on whether that square works.
The good news is there is not much to get wrong. The bad news is that the mistakes only show up once the cards are printed.
Two ways to get the code out
The code on its own. If you only want the QR code itself, to drop into something you are designing elsewhere, you can get the raw code from your event under QR codes. Put it in the invitation, in the programme, or on the place cards you were printing anyway.
eazyCreator. If you want the finished card, there is a designer built into your event. It is free, and it already knows your code and your event name.
Start from a template or a blank canvas. Templates can be filtered by size, orientation and theme, and for baptisms and confirmations there are girl, boy and neutral variants.
Sizes: A5, A6, A7, credit card and square, portrait or landscape. You can copy a design into another size afterwards and the content scales with it.
When you are done, export as PNG, as a PDF with one card, or as a PDF with several cards on an A4 sheet to cut out yourself.
eazyCreator works best on a computer. It runs on a phone, but a free canvas and a small screen are not friends.
How big the code has to be
This is the one thing that can genuinely ruin an evening.
The rule of thumb: the code should be at least 1/10 of the distance it is scanned from. A card on the table read from half a metre away needs a code around 50 mm. A poster scanned from two metres needs 20 cm.
The designer warns you if the code drops below 25 x 25 mm. Below that a scanner can no longer tell the individual squares apart, and then the texture of the paper and the light in the room decide whether it works.
And: never stretch the code. Break the proportions and the squares become rectangles, which can make the code unreadable. That goes for scaling a design up in another program afterwards too.
Where the cards go
One card per table is the minimum. People take photos all evening, not only when they sit down.
The placements that work:
- On the tables. In a holder, not lying flat under a plate.
- At the entrance. Make it big. This is where people are standing still anyway.
- At the bar. There is a queue, and the queue is looking at something.
- On the inside of the toilet door. It sounds like a joke. It is also the placement we hear about most.
- By your Photo Booth, if you have one.
Write a line above the code saying what happens when you scan it. "Scan and share your photos from today" does more than a bare square.
Print it properly
Test before you print the rest. Print one card, put it on a table, and scan it sitting down with your own phone. Not off the screen. Not with the phone five centimetres away.
Matte paper over glossy. Glossy paper throws the ceiling lights straight back into the camera, and then the phone never finds the code.
Black on white scans best. A coloured code on a coloured background can work fine, but the contrast has to be high. Test it if you make one.
Leave air around the code. A code squeezed to the very edge of the card is harder for a camera to find than one with a white margin.
The link is the same all the way through
All your guests share the same link, and there is no app and no account. The guest scans, types their name, and they are in.
Which also means you can share the link in a message, in a Facebook event, or in an email to the people who could not come. They land in exactly the same place as the ones who scanned the card.
The codes for the screens in the room are a separate thing. Those live under Live features, and they are covered in the Live Wall guide.
Read next
Inspired by these guides?
Start capturing memories at your own event today with eazy.photo.
Get Started